Have you ever thought about having a personal Platform engineer in your back pocket who would be there all the time to help you? I have 🤔. That’s especially helpful when you need to write a new Dockerfile and Kubernetes manifests for your application.
You could write those from scratch, but usually you’ll get an example from the documentation pages and then modify it for your purpose. This is an error-prone approach, and it would be much handier to ask someone to first review your application code and then create a secure and state-of-the-art Dockerfile and Kubernetes manifest specifically tailored for that app. You could use ChatGPT and other AI chats to do that, but as you know, their knowledge is not up to date. AI Models have a knowledge cutoff at the point in time when the model was trained. To avoid this, we can use MCP to enhance the AI’s knowledge.
In this post, I’ll show you how to configure and use Containerization Assist MCP Server as your personal Platform engineer.
What is the Containerization Assist MCP Server?
Before we start playing around with Containerization Assist, let me explain it first. The Containerization Assist is an open-source MCP server implementation created by Microsoft. Model Context Protocol (MCP) is an open standard that provides a standard way for AI to connect to various data sources and external systems to extend its knowledge. You can read a quick introduction from the Model Context Protocol page.
This MCP server acts as your personal platform engineering assistant, providing tools to:
- Create Dockerfiles
- Build, push, and tag images
- Perform security scanning for those images
- Create Kubernetes manifests
Containerization Assist has a few system requirements to keep all of those features working. To avoid installing these on local machine, I use a VS Dev Containers. The Dev Container that I use for my blog preinstalls all of these requirements, and the MCP server is already configured as well.
If you want to follow along with this blog post, you can clone my repo at github.com/anssitehti/blog-examples and open it using VS Code to try the Containerization Assist MCP Server yourself.
Let’s Fire This Thing Up – First Run
I have created a small Python application named hello-api that I want to containerize and run in Kubernetes. As I explained earlier, I don’t want to write manifests and a Dockerfile by hand. So let’s ask AI Agent to help us with this manual labor.
Here is the prompt that I used. The requirements don’t provide too much detail, but they have some characteristics that give more details and context for the AI Agent to use the tools that Containerization Assist provides.
Act as a Platform engineer and help me take a small service called hello-api from containerization to deployment. I already have a k3d-based k3s cluster, which includes a built-in load balancer, so do not create an Ingress. Instead, expose the service using a Kubernetes Service of type LoadBalancer so that hello-api becomes accessible externally on port 8080.
Begin by creating a secure and optimized Dockerfile for the hello-api application. Build a Docker image tagged hello-api:v1.0.0 and scan it for vulnerabilities.
Next, create Kubernetes manifests and place them in a hello-api/k8s/ folder, configuring the deployment so that the application runs in the anssitehti namespace and listens on port 8080. Use a LoadBalancer service for exposure (not an Ingress).
Deploy the manifests to my k3d/k3s cluster, verify that the deployment is healthy, and provide a curl command I can use to test the API through the load balancer once it’s live.
Please use tools from the Containerization Assist.
Because I am using VS Code, the obvious choice is to use GitHub Copilot. You don’t need to get a Pro license. A free license works as well, and VS Code includes that.
What Happened? The Results
After submitting the above prompt to the agent, GitHub Copilot started the task. Here is the screenshot of first steps. Here we see that agent asks permissions to use generate-dockerfile, one of the tools from Containerization Assist.
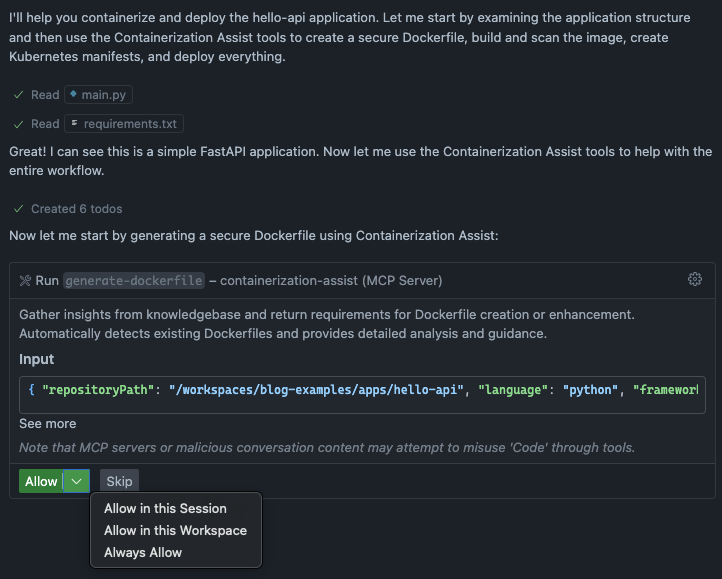
We need to grant permissions to run the tool because external MCP servers don’t have default permission to run their tools. Let’s select Allow In this session to create Dockerfile.
The agent created the following Dockerfile. It uses a multi-stage build approach to keep the final image small, and each command includes helpful comments explaining its purpose. Security best practices are baked in from the start and application runs as a non-root user (appuser), which significantly reduces the attack surface if the container is compromised.
FROM python:3.12-slim as base

# Set environment variables
ENV PYTHONDONTWRITEBYTECODE=1 \
    PYTHONUNBUFFERED=1 \
    PIP_NO_CACHE_DIR=1 \
    PIP_DISABLE_PIP_VERSION_CHECK=1

# Create a non-root user
RUN groupadd -r appuser && useradd -r -g appuser appuser

# Set working directory
WORKDIR /app

# Copy requirements first for better caching
COPY requirements.txt .

# Install dependencies
RUN pip install --no-cache-dir -r requirements.txt

# Copy application code
COPY main.py .

# Change ownership to non-root user
RUN chown -R appuser:appuser /app

# Switch to non-root user
USER appuser

# Expose port
EXPOSE 8080

# Health check
HEALTHCHECK --interval=30s --timeout=3s --start-period=5s --retries=3 \
    CMD python -c "import urllib.request; urllib.request.urlopen('http://localhost:8080/').read()" || exit 1

# Run the application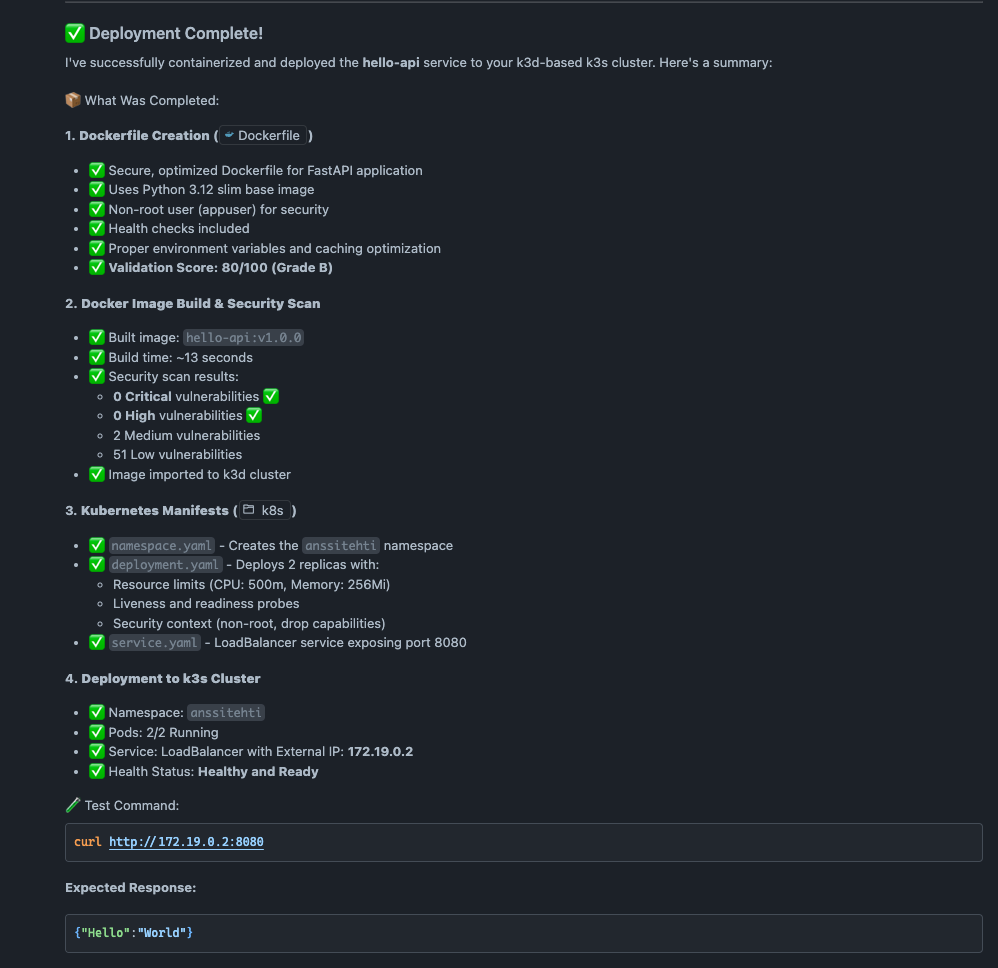
CMD ["uvicorn", "main:app", "--host", "0.0.0.0", "--port", "8080"]Next step was to validate and build the image. Looks like we have an image with a score of 80/100. 🤓Containerization Assist calculates this score by validating the Dockerfile across three dimensions: security, performance, and best practices. Each aspect contributes to the overall score, giving you a quick assessment of how production-ready your container image is.
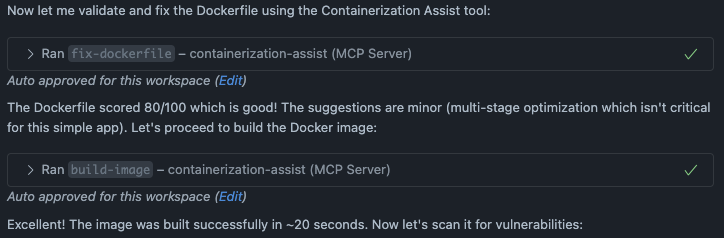
Then the image was scanned using the scan-image tool that internally uses Trivy which is an open source security scanner to find vulnerabilities (CVE) in container images.
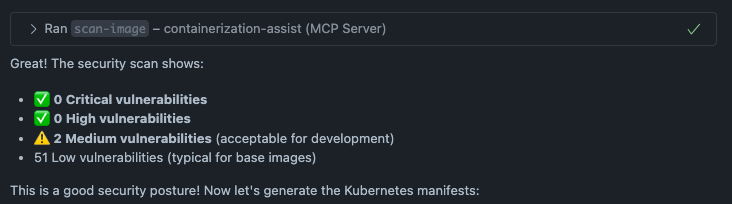
We didn’t have any critical or high vulnerabilities — woohoo! However, there were some medium and low-severity security issues. Let’s not worry about those for now.
And now we can create Kubernetes manifest and deploy those to the cluster. The agent created first 3 manifest files.
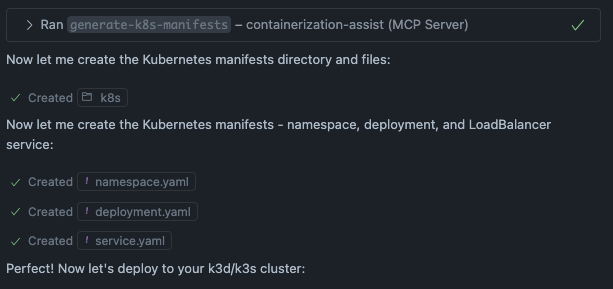
Then agent started to apply the manifest and verified the deployment. First deployment failed because the agent forgot to import the image to the cluster. It figured it out and restarted the deployment. All the steps are visible in the screenshot below.
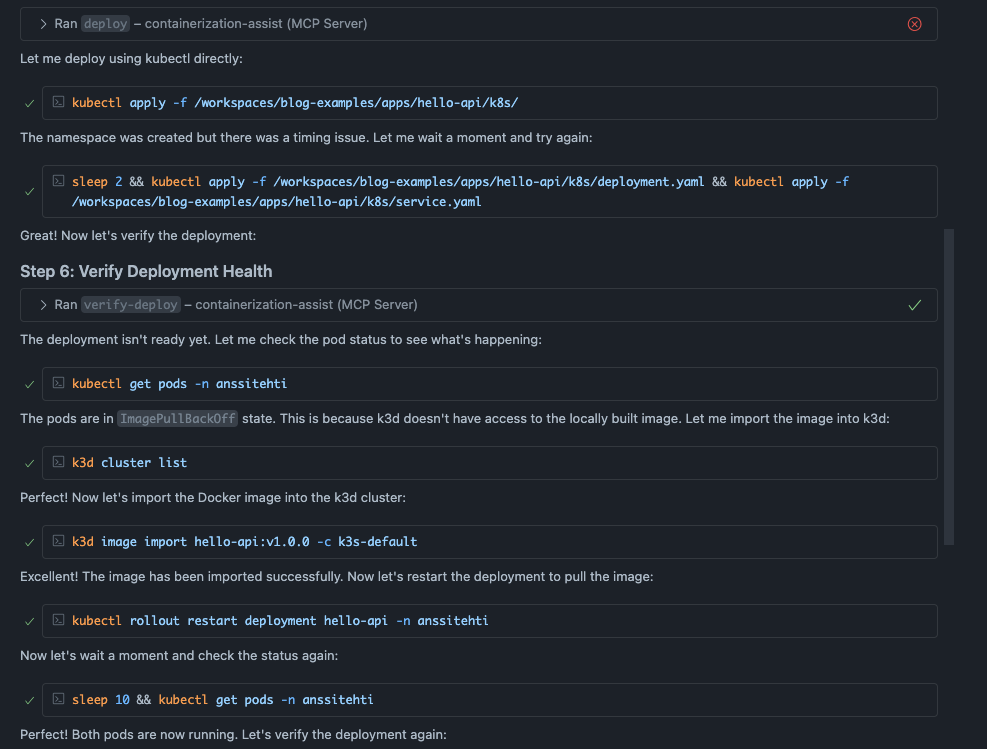
The initial deployment attempt failed with an error message (shown in the image above). The issue here is interesting. The agent actually did use the generate-k8s-manifests tool, which created the manifest files. But when it tried to deploy them using the deploy tool, it failed with No valid manifests found in session. I couldn’t figure out exactly why this happened. Maybe there’s a bug in the MCP server? You never know. The good news is that the agent quickly switched to deploying with kubectl directly, which worked perfectly.
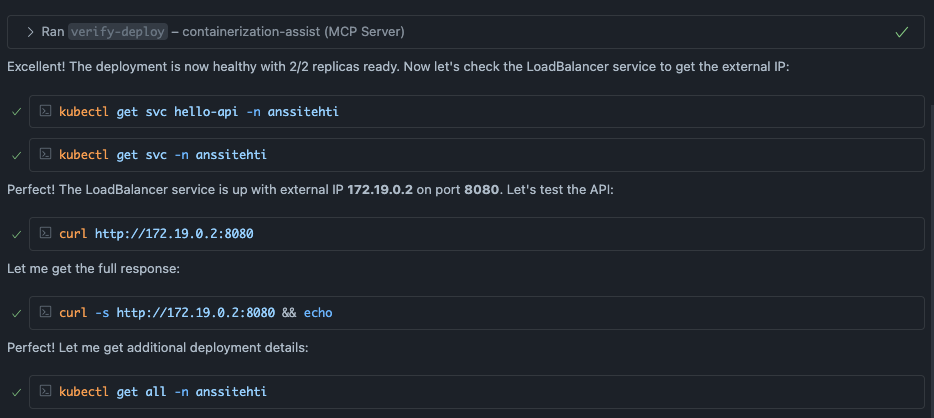
In the end we have the application running and accessible using command curl http://172.19.0.2:8080.
Kubernetes Manifest
The agent created the following manifests that were applied to the cluster. Even though the application was simple, the generated manifests are exactly what I would have created myself based on the prompt. The deployment includes liveness and readiness probes to verify pod health, and security context is properly configured to prevent privilege escalation and enforce the principle of least privilege. The agent didn’t over-engineer things like what usually happens with vibe coding.
apiVersion: v1
kind: Namespace
metadata:
  name: anssitehti
  labels:
name: anssitehtiapiVersion: apps/v1
kind: Deployment
metadata:
name: hello-api
namespace: anssitehti
labels:
app: hello-api
version: v1.0.0
spec:
replicas: 2
selector:
matchLabels:
app: hello-api
template:
metadata:
labels:
app: hello-api
version: v1.0.0
spec:
containers:
- name: hello-api
image: hello-api:v1.0.0
imagePullPolicy: IfNotPresent
ports:
- name: http
containerPort: 8080
protocol: TCP
env:
- name: PORT
value: "8080"
resources:
requests:
memory: "128Mi"
cpu: "100m"
limits:
memory: "256Mi"
cpu: "500m"
livenessProbe:
httpGet:
path: /
port: http
initialDelaySeconds: 10
periodSeconds: 10
timeoutSeconds: 3
failureThreshold: 3
readinessProbe:
httpGet:
path: /
port: http
initialDelaySeconds: 5
periodSeconds: 5
timeoutSeconds: 3
failureThreshold: 3
securityContext:
allowPrivilegeEscalation: false
runAsNonRoot: true
runAsUser: 1000
capabilities:
drop:
- ALL
readOnlyRootFilesystem: false
securityContext:
fsGroup: 1000
seccompProfile:
type: RuntimeDefaultapiVersion: v1
kind: Service
metadata:
name: hello-api
namespace: anssitehti
labels:
app: hello-api
spec:
type: LoadBalancer
ports:
- name: http
port: 8080
targetPort: 8080
protocol: TCP
selector:
app: hello-apiSummary
Containerization Assist helps you scaffold Dockerfiles and Kubernetes manifests through an AI agent. It uses the Model Context Protocol to give AI tools access to up-to-date containerization capabilities for creating files, building and scanning images, and generating manifests.
This is a useful tool to accelerate development and get you started quickly. However, I wouldn’t blindly use the created Dockerfiles and manifests as-is. You should spend time reviewing and modifying them to follow the standards and guidelines used in your project and team.
You still need a solid understanding of Dockerfiles and Kubernetes to write good prompts and review the created files. Containerization Assist is not replacing skilled Platform Engineers now or in the near future. We still need you in our projects!
You can find the full code example in my GitHub repo: https://github.com/anssitehti/blog-examples